I never experimented with machine learning or denoising. I guess
having obscure matrices combined together to produce some result scared me a
bit.. Surprising for someone who loves computer graphics… 🙃
After failing an interview for an ML-related position (surprising?) I thought
enough is enough, time to play catch-up!
For this project, I started with the basics: Andrew NG ML course. After a couple days — and obviously becoming the greatest ML expert in the world — I decided to tackle the easiest problem ever: image denoising!
The goal
Denoising is a complex field, and some very bright people are making a career out of it. Not my goal!
Here I’ll try to explore some classic denoising techniques, implement them, and once used to some of the problems, build a custom model to improve the result.
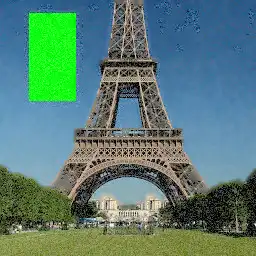
The input:

I believe this should be a good candidate:
- has a flat shape to check edge preservation.
- has some “noise” to keep (foliage).
- has some small structured details (steel beams).
- has smooth gradients (sky).
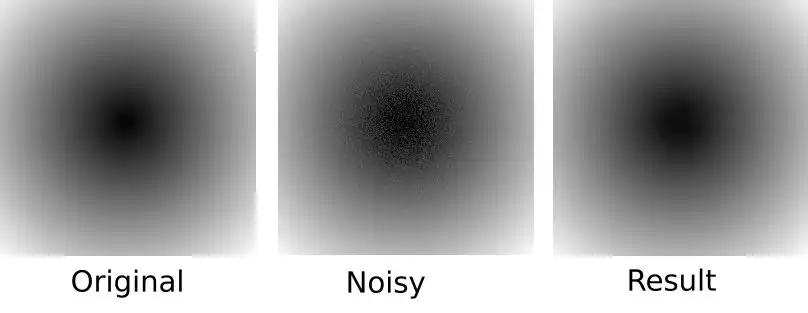
Step 1 - sanity check

From Wikipedia:
noise is a general term for unwanted […] modifications that a signal may suffer
The graph above represents a line of pixels being part of a smooth shade. In red are 2 bad pixels. They are bad because they interrupt the smoothness of our graph, and thus are perceived as noise.
How can we remove some outliers in that case? Averaging! Each pixel value is averaged in regard to its neighbors. In this case, this would help reduce perceptible noise.
  foreach x, y in image
    neighbors = extract_window_around(image, x, y, window_size=10)
    res = average(neighbors)
    image.set(x, y, res)
But in real life, that’s terrible..
The reason for this poor performance is we don’t discriminate valid details from noise. We loose our edges, and all details are lost.
Step 3 - Better average - YUV vs RGB
The previous image was generated by averaging RGB values using a 10-pixels sliding window. Because it was averaging RGB values, it mixed colors. As result, edges were blurred in a very perceptible way, leading to an unpleasant result.
YUV is another color representation, splitting the channels not as red, green, and blue, but color, and luminosity. Colors are represented using polar coordinates, and luminosity is a single linear value.
If we look at the sky, the noise doesn’t seem to alter the color a lot, only the brightness of the blue. So averaging using the same window, but only on the luminance component should give better results:

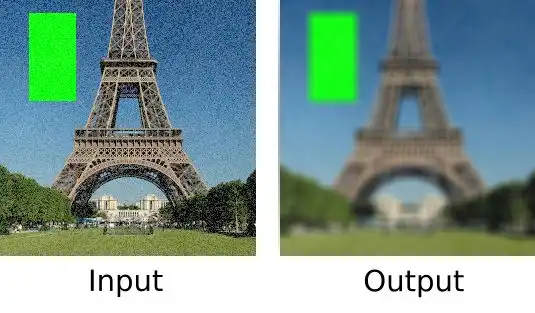
Step 4 - selective average
Using YUV vs RGB helped: the sky looks fine, and the green edges look sharper. Sadly, the rest of the image looks bad. The reason is that I still use the same window size for the sky and the tower.
I can improve that solution using a new input: an edge intensity map. Using the well known Sobel operator I can generate the list of areas to avoid.
  edge_map = sobel(image)
  foreach x, y in image
    window_size = lerp(10, 1, edge_map.at(x, y))
    neighbors = extract_window_around(image, x, y, window_size)
    res = average(neighbors)
    image.set(x, y, res)
- ✅ The square edges are preserved.
- ✅ The sky blur is gone
- ✅ The Eiffel Tower’s edges seem preserved.
- ❌ Artifacts visible in the sky (top-right)
- ❌ The foliage texture is lost.
- ❌ The metallic structure lost precision.
- ❌ The grass mowing pattern is completely lost.
Step 5 - ML-based noise detection
In the previous step, I tried to discriminate areas to blur and keep as-is. The issue is my discrimination criteria: edges. I was focusing on keeping edges, but lost good noise like the foliage.
So now I wonder, can I split good noise from bad noise using a classification model?
  foreach x, y in image
    window = extract_window_around(image, x, y, window_size)
    bad_noise_probability = run_model(window)
    blur_window_size = lerp(1, 10, bad_noise_probability)
    res = average_pixels(image, x, y, blur_window_size)
    image.set(x, y, res)
For this model, I tried to go with a naïve approach:
- select a set of clean images
- generate their noisy counterpart in an image editor
- split these images in 16x16 pixel chunks.
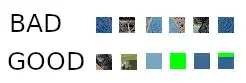
Those would represent my training & test set (6000 items and 600 items). The goal is now from a 16 pixel window, determine if the pixel belongs to noise, or belongs to some details.
Then, I would iterate over my pixels, extract the 16x16 window around, run the model on it, and use this probability to select my blur window. My guess is that we should now be able to differentiate foliage from sky noise.
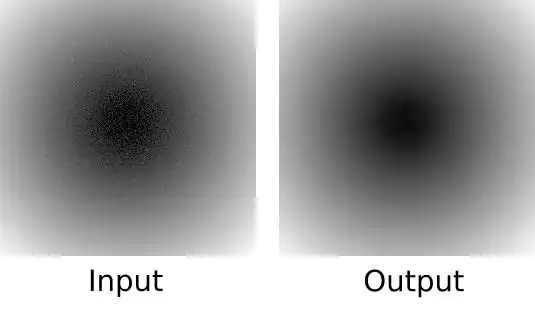
Here is the model output: in red the parts to clean, in black the parts to keep.

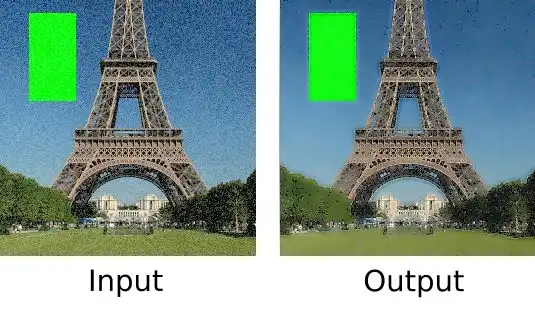
And here is the output:
- ✅ Edges are preserved.
- ✅ Steel structure is clear in the middle.
- ✅ Left foliage looks textured.
- ❌ Right foliage shadows are still noisy.
- ❌ Some areas of the steel structure are blurred.
- ❌ Sky has artifacts.
The model training set is composed of only ~6000 chunks extracted from 4 images (2 good, 2 noisy). Training the same model on a better dataset might be a first solution to improve the noise classification.
This result seems better than the bilateral filtering, so I guess that’s enough for a first step into the ML world. I will stop there for now, and move on to the next project!